Hoo-hoo-hoo-hoo! Hopefully you’ll recognize this balloon as Tigger from Winnie-the-Pooh. I made this for a friend who used to dress up in a Tigger costume! Happy Birthday Chi!
To make this balloon, I used 3 orange 260s for the head, arms, body, and tail, as well as an orange 350 for the legs. I also used a blush 260 and 350 for the head and body, a pink scrap for the nose, and a red scrap for the tongue. Afterwards, I added the stripes and eyes with a black marker.
This balloon bouquet was made for a couple celebrating their new home and soon coming baby boy. My husband and I met them almost a year ago, have gotten to know them well, and are excited for their coming little one. Congrats to you both!! 🙂
In this bouquet, I included a Betallatex 5″ emoji round balloon, which I just received in my recent order of balloons from larocksmagic.com. I decided to order from them this time, as they have a larger assortment of balloons in their catalog at great prices.
For the stems I used the Qualatex Fashion Wintergreen 160Qs. I like using this shade of green for the stems.
This tandem bike was made for my friends who recently got married! Congratulations LL&A!
I based the design on Vyacheslav’s bicycle. I extended the bicycle frame to make a tandem bicycle (and then added another seat and set of pedals.) I only had white round balloons, so the wheels are white instead of silver. Also, I used a 160 balloon instead of a 260 for the tires.
To make this balloon, I used:
Four 260s for the bicycle frame
Two small rounds (or quick links) for the wheels
Some scraps to help secure the wheels
Two black 160s for the tires and pedals
One black 260 for the seats and handlebars
It’s Snoopy the Flying Ace! This balloon was for a friend who has logged many hours in the sky. Congrats on your graduation and can’t wait to hear about your new adventures!
I saw this on Pinterest and really liked the design. So I figured out how to make it from the photo. Next time, I will try to make the goggles differently.
To make this balloon, I used a couple white 260s for the body and legs, a white 160 for the arms, a white heart for the head, two green 260s for the hat, a red 160 for the scarf, a brown 160 and black 160 scrap for the goggles, and a black scrap for the nose. The body is pretty straightforward – the head is the more complicated part. The nose was attached the same way I attached the cherry to the ice cream. I also twisted a side wall bubble in the heart balloon to help attach the head.
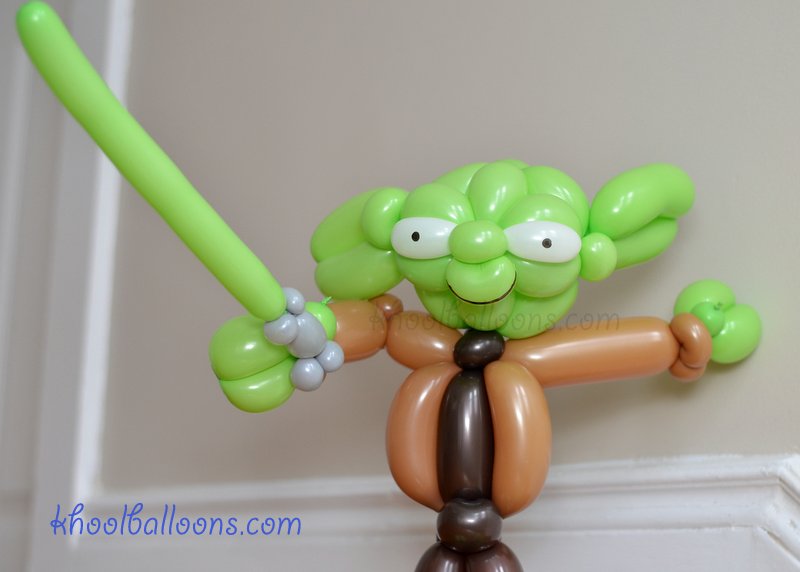
I’ve been wanting to make another Star Wars balloon of some sort, having recently watched “Rouge One” and “A New Hope” again. Thank you, Princess Leia!
To make this balloon, you’ll need:
two brown 160s for the hair
one 6″ blush Quick Link for the head
one white 160 for the arms
one blush 160 scrap for the hands
one gray 160 for the belt
one white 350 and one white 260 for the body
This balloon design is similar to many of the other princesses I have done, but I took some time figuring out how I wanted to do the hair and head. I used a Quick Link for the head. (Quick Link balloons have tying places at two ends of the balloons, both of which can be used to attach the balloon.) I used the two ends of the Quick Link to attach the hair. If I had remembered, I would also have inserted a raisin into the balloon to attach the head to the body. To create the hair buns, I used the same technique used to create the cupcake frosting.
Hope everyone is enjoying the end of 2016. I am off from work and have had the chance to do a little more twisting – I plan to get a few more posts in this year. I made a couple of these cute Christmas penguins to put in some gift bags last week.
To make this balloon, you’ll need a black 260, a white 260, a red 260 (scrap), and orange and white 160 scraps. I followed Vyacheslav’s tutorial video. He also adds a Christmas tree and present to the penguin balloon. Penguins are a great balloon to make – they are popular birds, super cute, and a great way to use up any extra white and black balloons.
Happy happy birthday to my wonderful niece! Can’t believe it’s been 5 years already since I made you this princess balloon for your birthday.
For this bouquet, I added a heart and a Hello Kitty balloon. Different shapes are fun, and who doesn’t like Hello Kitty? Using such balloons also saves your fingers from having to twist additional flowers.
A couple of the flowers petals deflated by the next day. (That’s okay – you can’t really tell.) I’ll have to remember to let a little air out of the balloon before tying to help avoid popping/deflation.
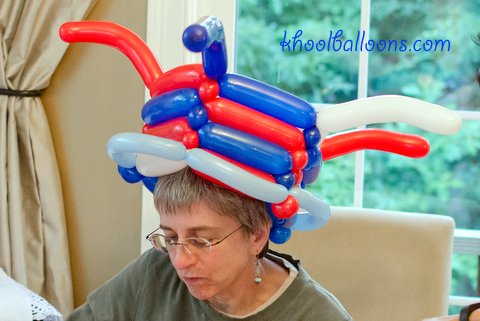
This balloon hat was made for a special birthday boy, my super-energetic nephew. (Can’t believe you’re growing up so quickly!)
This hat has the same base as the five-sided birthday cake and this other hat. You can choose different colors and arrange the ends in various ways to create many unique and fun hats. It takes me about 15 minutes now.
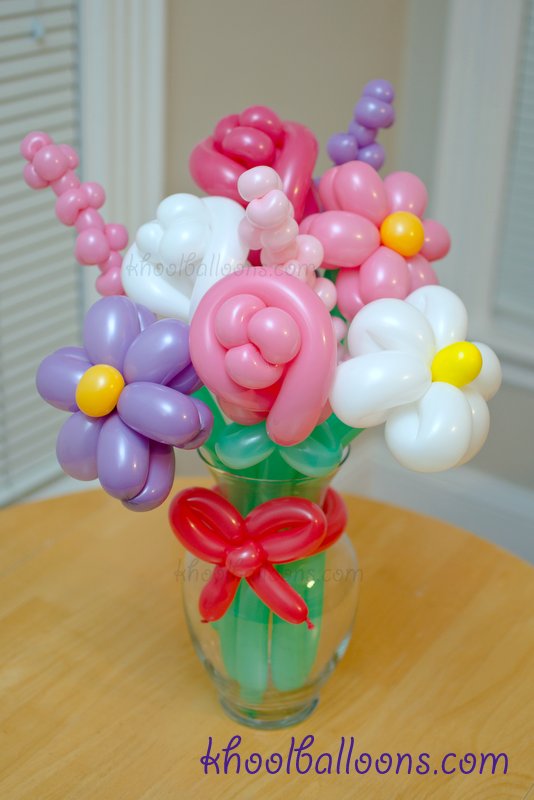
This flower bouquet was made for my friend’s baby shower. Congratulations Katie on your coming bundle of joy! 🙂
You can make a vase out of balloons, but I often like using a real glass vase. It looks nice and it is sturdy. For the stems, I like to use the wintergreen 160 balloons, which are part of the Qualatex 160 Vibrant Assortment. Of course, any green will work. Many of these flowers I’ve made before, but I did look up a tutorial for the rose. There are many rose videos out there – I used this video by Yonaimy. Lastly, you get to use your flower arranging skills. 🙂
These baby bootees were hung as a wall decoration for a baby shower.
To make these balloons, I followed Vyacheslav’s video tutorial. (The video is in Russian, but can easily be followed. Check out his other tutorials!) I didn’t have pink small rounds and used two pink large rounds instead. This balloon requires a pretty neat advanced technique to get the shape of the shoes – you’ll inflate a 160 or 260 balloon segment inside of a round balloon and then deflate the round balloon a bit. Very cute!
2016 is the year of the monkey according to the Chinese zodiac. I twisted the above monkey for a baby shower this past weekend (more photos to come!)
This was the first time I used a geo blossom balloon as a base. I’ve read how other balloon artists have partially filled the geo blossom with water or other weights to keep the balloon upright. I didn’t fill the balloon with anything but air, and used Scotch tape on the bottom of the geo blossom, which worked well for me.
Cakes are high on the list of balloons I twist. (Who doesn’t like cake?) Here’s one I made for a Christmas party. I added a red stripe on the sides to make it a little more festive. Merry Christmas!
This balloon was made for a co-worker who is retiring. He was my first mentor at my first job out of college, and I have learned so much from him! Congrats Dave!
To make this balloon, I followed a video by Flash the Magician. My husband has some suggestions for changes, so I may try to modify the design some.
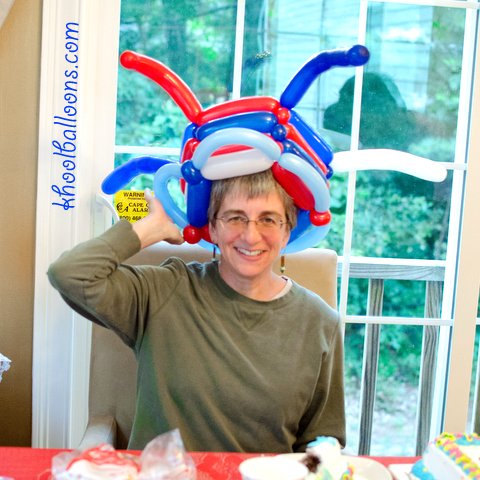
A very special happy July 4th birthday to my lovely and talented Aunt Jess! My aunt, uncle, and cousin visited and we got to celebrate in person. We had a great time vacationing in Cape Cod with family and friends.
Designed on the fly, this hat is five-sided and uses five 260 balloons. (You could make it with any number of sides three or greater, but I like five.) It uses a circular weaving pattern, the same one I use to make a birthday cake. I also added a brim with a 160 balloon. Afterwards, I bent the remaining balloon segments so that they curve downward.
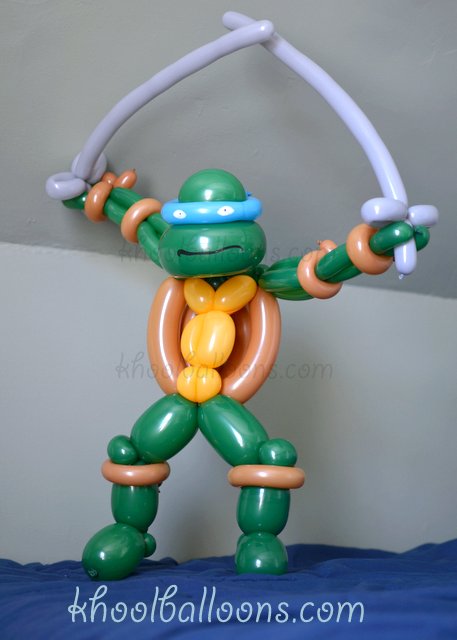
Happy Birthday to my super energetic and fun nephew! His favorite Ninja Turtle is Leonardo, the leader of the team!
I’ve made Donatello before, following instructions from balloonmodels.com. This time, I figured out a different design.
To make this balloon, I used a green 350 for the head (with the same design as before), a brown and a goldenrod 260s for the shell, green 160s for the arms, a green 350 for the legs, two gray 160s for the swords, and brown 160s for the arm bands and leg bands. I had meant to take a picture of the new design of the shell, but forgot! I finished the balloon by using a a white paint marker and black marker for the face.
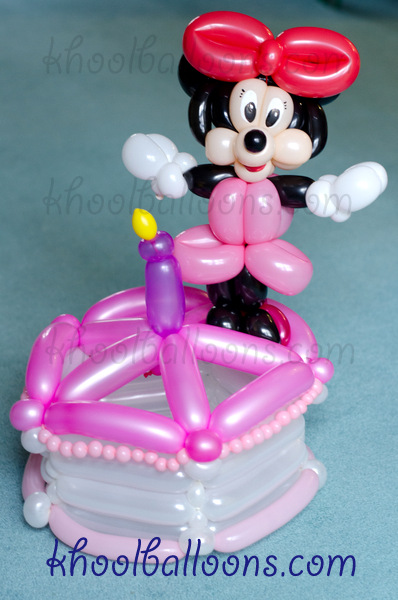
This birthday cake was made for a fun, energetic little girl who LOVES Minnie Mouse! Happy Birthday Kylen! 🙂 It was so great to celebrate with you! Can’t believe you’re growing up so quickly!
This balloon is a birthday cake balloon with a Minnie Mouse balloon on top (the feet are squeezed in.) I had thought about twisting Minnie Mouse permanently in on top of the cake, but this way, you can easily take Minnie off and just hold the Minnie Mouse balloon if you want.
The balloon cake uses the same pentagonal base design you see in most of my ballooncakes. Minnie Mouse is made based on this design by Syan. I need to work on the cheeks a bit so Minnie is less like a chipmunk. Not pictured here is a heart balloon that I attached to Minnie’s hand with “Happy Birthday!” written on it.
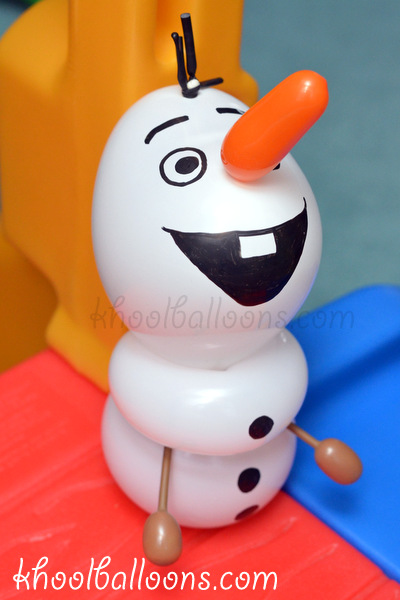
Here’s a snowman designed to look like Olaf, the snowman from the popular movie “Frozen.” I followed the video by Changsunny (with a couple small modifications.) I liked this one the best out of all of the other many balloon Olafs I’ve seen. It’s a simple design, but requires a few more advanced twists.
To make this balloon, you’ll use a 6″ white heart balloon for the head, a [small part of a] white 260 for the middle part of the body, and a round 5″ balloon for the bottom. Also, you’ll need the ends of two brown 160s for the stick arms, a small scrap orange 160 for the nose, and an uninflated scrap black balloon for the “hair.”
The one thing I did differently was the nose. I made it longer and used a different technique to attach the nose. In the video Changsunny uses tape, but with this technique you only use balloons. It’s a little more difficult, but if you have the time, then I think it’s worth it.
To attach the nose, turn the heart balloon inside out; then inflate the orange balloon while it’s inside the heart balloon and tie. Afterwards, inflate the heart balloon, but don’t pull the knot all the way through (you’ll be deflating it later on.) Figure out where you want to attach the nose to the heart, grab the knot from the nose, twist, and tie the nose to the heart with an uninflated balloon. Lastly, deflate the heart balloon, and turn it inside out again while pushing out the nose. This might be a little hard to understand – check out Patricia Bunnell’s dog design to see the photos for how she attaches the nose of the dog.
The one other thing I might do differently next time is use a larger round balloon for the bottom of the snowman to give it a slightly larger base. While trying to attach the bottom balloon, I actually popped the round balloon twice and had to put in less air when I tried again. A larger round balloon would be less likely to pop.
This balloon is for a super cool person, who also happens to be a football-playing princess. We will all miss you very much Mel! (At least you’re moving to a place not too far, and we’ll see you again soon!)
I’ve made a Princess Belle and Snow White before. The Princess Mel balloon is similar to Princess Belle, except for the head and hair. (You may want to view Unicaw89’s princess video.) For that I used two-three black 160s and a 5″ round (I bought a bag of blush 5″ round balloons for this very reason!) A raisin twist is used to help attach the hair. I watched JocelynBalloon’s excellent video to make the hair – it’s pretty cool how the hair is done.
It’s Emmet from “The Lego Movie!” I made this one for an 8 year old birthday boy. I haven’t seen the movie myself yet, but I heard it’s pretty good!
To make this balloon, I used a large round balloon for the head, some brown 160s for the hair, an orange 350 and 260 for the body, an orange 350 for the legs, a blue 260 for the arms, and yellow 160 scraps for the hands.
I spent the most time trying to figure out the head/hair. I ended up using 4 raisins to help hold the hair. To try to make the round balloon less round and more flat at the top and bottom, there is an uninflated bottom pulling the top and the bottom of the balloon together. I used a raisin to attach the uninflated balloon to the top inside of the balloon.
A raisin twist is a method to attach a balloon to another balloon where there normally would be no place to attach a balloon. You do this by putting a raisin (a balloon knot) into the balloon, then grabbing the knot from the outside and twisting/tying a balloon around it. See this balloon forum for some pics.